
Explanation of Tabs
SuperDashboard
This tab is mostly used by Premium Tier users to quickly select the character (Choose a Preset) they would like to use for prompt generation. Once the character is selected, you will be redirected to the Dashboard tab where you can work.
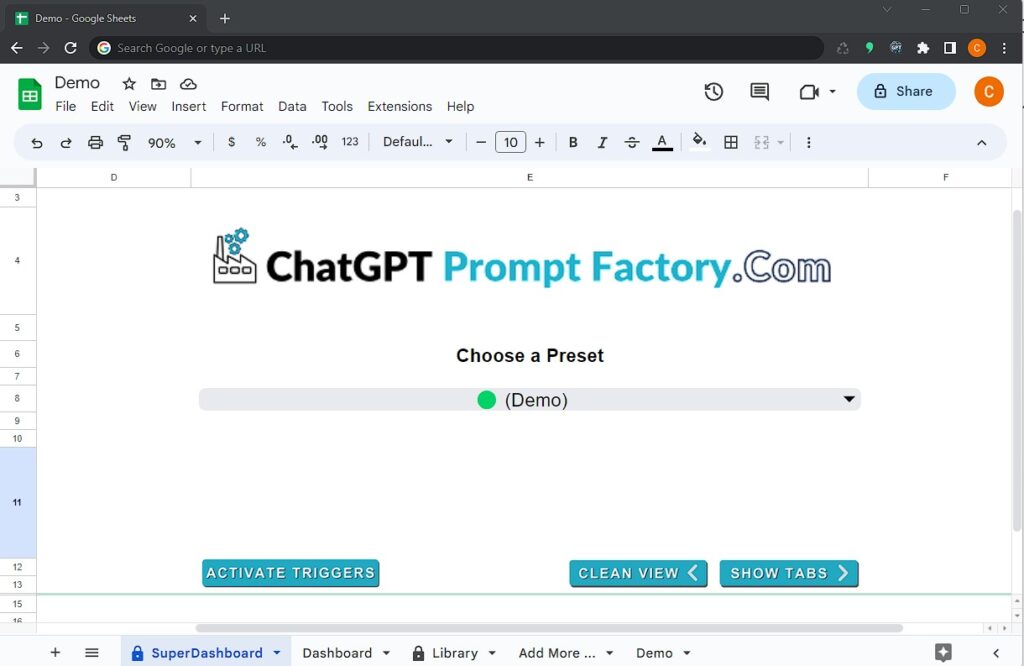
Another use of the SuperDashboard tab is to show or hide unnecessary tabs. Once the “Show Tabs” button is pressed, all customizable tabs will appear (based on your tier: Demo +3 for Starter, Demo +8 for Plus, and Demo +19 for Premium Tier). Once the “Clean View” button is pressed, unnecessary tabs (customizable characters) will be hidden
On the SuperDashboard, there is also a button for activating the tool’s functionality: the “Activate Triggers” button. Once this button is pressed, you will need to wait for 10-15 seconds until you see “script finished” and a confirmation pop-up saying that triggers have been successfully activated
Dashboard
Based on your tier, the dashboard provides you with a number of automation (lines). This is the main area of the tool where you enter topics and your thoughts, and where prompts are generated.
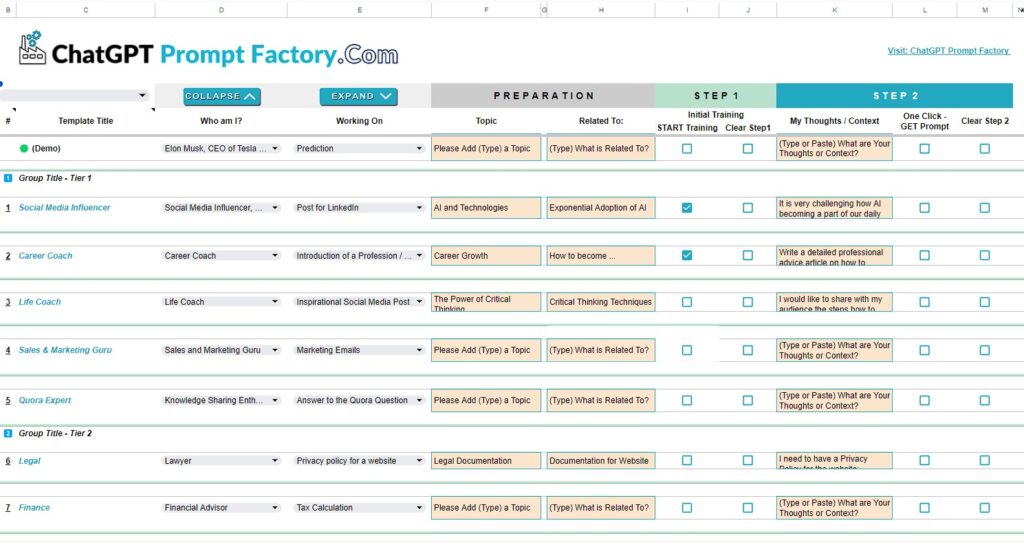
Lines: Each character has its own line in the tool, which starts with a number.

If you hover over the number (in column B), you will see a tab. Once you press on this tab, you will be redirected to the specific character customization tab where you can customize your character.
On the Dashboard tab, you can see all roles and characters. You can expand and collapse the list. Different tiers have different numbers of roles in their package: 4 automations for Starter, 9 for Plus, and 20 for the Premium package.
On the dashboard’s C column, you can change the values and rename roles/characters as per your needs. This will help you to quickly identify the character.
It’s important to know that you should not change any formulas of any of the rows as that can result in breaking the functionality.
📌Remember, (on the Dashboard) you only need to:
- Title your line (Column C)
- Choose who you are (how you would like ChatGPT to act) Column D.
- Choose what you are working on – Column E.
- The only fields for entering text are with prefield text, such as “Please add (type) a Topic”. These are in columns F, H, and K. 👇

The “Collapse” and “Expand” buttons are self-explanatory. They are used mostly by Premium Tier users to expand or collapse the lines.
If you would like to select a particular row (to have only one row appear), you can simply use the dropdown menu in Row C2.

Once a role/character is selected, all other lines will be hidden, and only the selected line will be displayed.